This guide shows you how to put a new visitor badge roll into the self-service kiosk printer and reset the badge counter. At the end you'll find how to get notified when badges are running low.
All devices managed through RespaManager (Systam X, Systam Lite, Table-X) use the same Brother QL-700 printer, so the roll is replaced the same way on every model. The most common badge size is 62 x 100 mm, and one roll holds 300 badges.
Replacing the roll
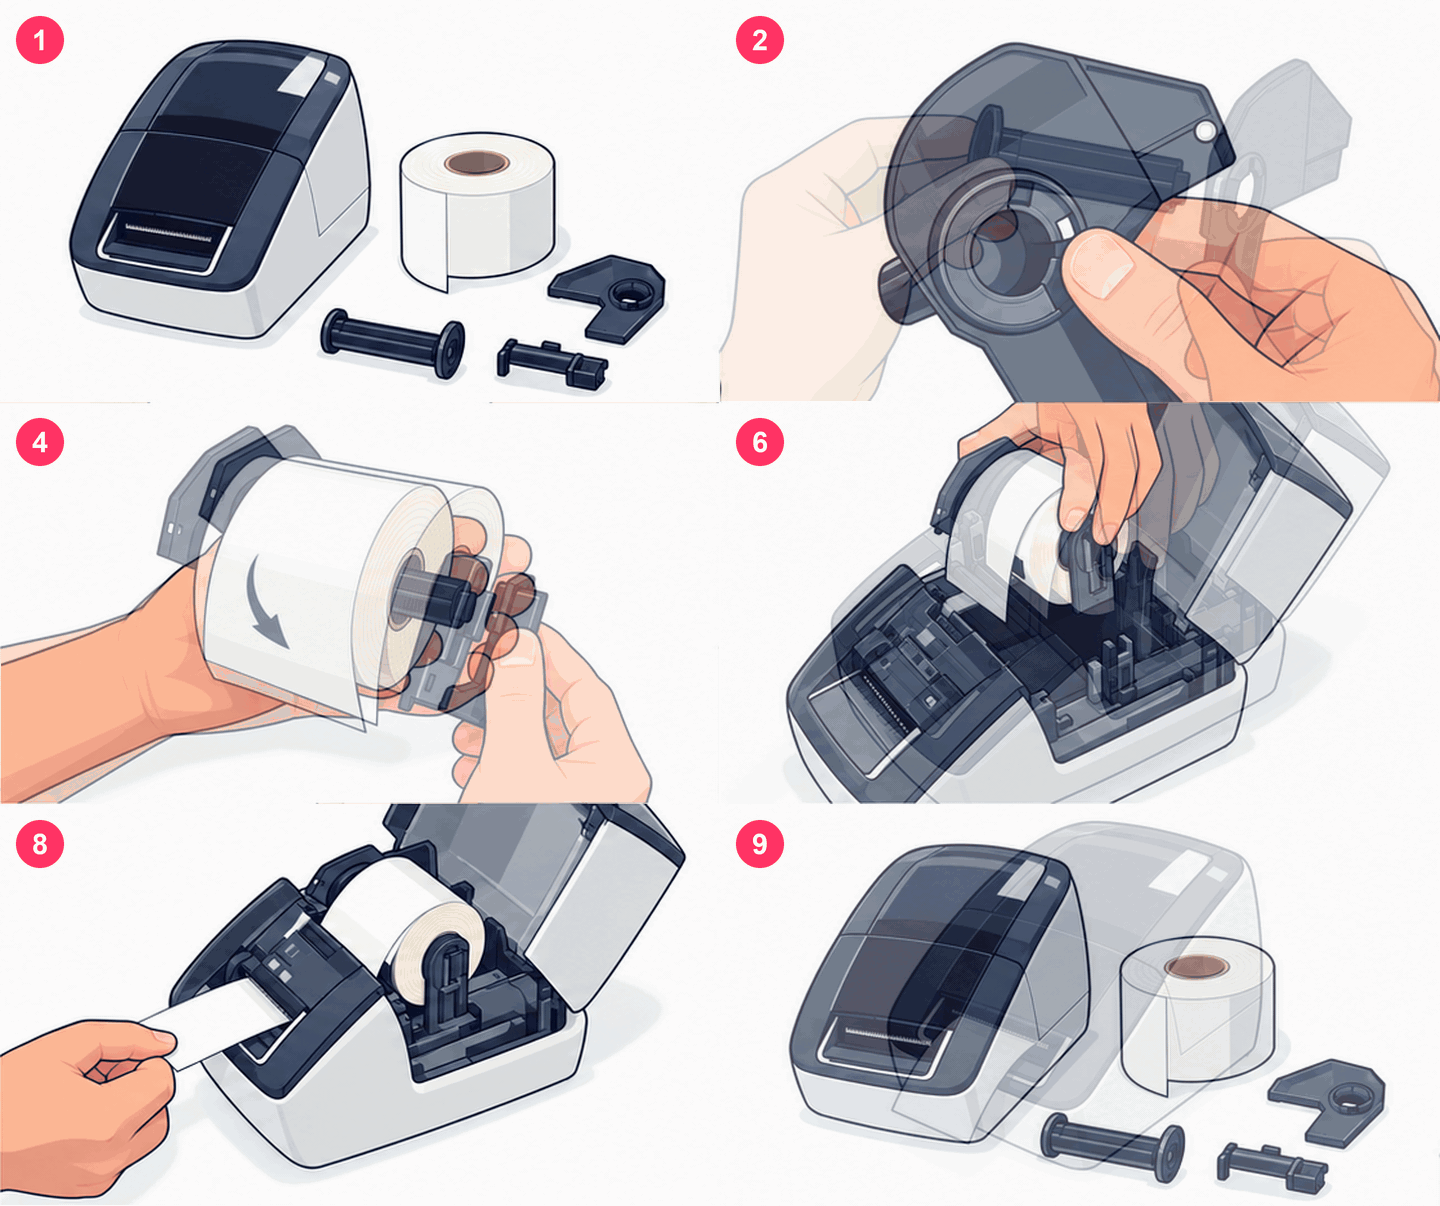
- If needed, open the kiosk's printer hatch to reach the printer. The hatch and the printer's location vary by device model.
- Open the printer lid by pulling the small slot on top of the printer. Lift out the empty or nearly empty roll.
- Take the roll holder apart. You now have the roll and parts A, B and C in front of you.
- Push part A through the hole in part B. The two parts line up with a small notch.
- Slide the new roll onto part A and line up part C with the notch.
- Once the parts are together, check that the roll turns the right way.
- Lower the roll into the printer and slide part C into the joint in the printer.
- Feed the end of the roll through the opening inside the printer so that it comes out the front.
- Close the lid. The printer lines up the roll by itself.
You can also download the illustrated guide as a printable PDF: How to insert badges.
If these steps don't match your device, contact support and tell us the device model.
Resetting the badge counter
Once the new roll is in place, reset the counter so the notifications arrive at the right time.
- Log in to RespaManager.
- Go to Management → Settings → Badge counters.
- Press Reset counter next to the kiosk whose roll you replaced. If you have several kiosks, check the name before resetting.

Getting notified when badges run low
RespaManager sends an email when 30, 20 and 10 badges are left on the roll. Once the badges run out, a notification is sent after every sign-in.
The notification goes to the assistant's email address. You'll find it with admin or front desk credentials under Management → Settings → Assistant → Email. To send the notification to several addresses, separate them with a semicolon, e.g. reception1@company.com;reception2@company.com. See also Setting up assistant information.
Note: if the printer is connected to the reception computer instead of a kiosk, no notifications are sent. In that case it's a good idea to keep an eye on the roll yourself.
New roll in, and your visitor badges are printing again.
Related articles
Was this article helpful?
That’s Great!
Thank you for your feedback
Sorry! We couldn't be helpful
Thank you for your feedback
Feedback sent
We appreciate your effort and will try to fix the article